Contents — find the section you need
Change parameters and verify
Open the panel, then press Run to load Python. You can stop execution and reset parameters. Results are computed on this device. No Python installation is required.
Local execution steps below are optional for reproducing the source results; they are not required for the browser experiment.
The experiment controls are in English.
Explore storage boundaries in the browser
The panel models storage ownership and container connections. It does not run Docker or access your files. Choose a storage location and operation, then compare the stage diagram and evidence table. Local Docker commands below are optional follow-up work.
Each run starts from the same prepared fixture: /data/note.txt contains saved in the selected store, and /tmp/note.txt contains temporary in the container's writable layer. The image has no initial files at /data; application startup creates no files. The selected mount's read-only setting is applied after preparation. At the end, the model attempts to write a different file, /data/probe.txt. That marker never recreates the original note.
The named volume uses the default project-scoped name alpha_data. The external volume is pre-existing shared_data; the bind mount always uses the same absolute daemon-host path /srv/demo-data. Both fixed sources remain the same when changing projects. No custom volume name, anonymous volumes, tmpfs, driver options, image-to-volume population, permissions beyond the read-only mount, or other containers are modeled.
“Switch project” means alpha is taken down without deleting volumes, then beta is started. “Switch back” repeats that operation to return to alpha. A new empty beta_data can hide access to the original note without deleting alpha_data. The diagram distinguishes retained data from a readable connection. The read-only control applies only to mounts and has no effect in the writable-layer case.
Try these comparisons: restart versus recreate for the writable layer; ordinary down versus down --volumes for a managed named volume; project switching versus switching back; and managed versus external volumes during cleanup. Each removal scenario includes starting the service again. Metrics are binary outcomes (1 = yes, 0 = no), not probabilities, timings, or recovery guarantees.
Rules were checked against Docker storage, volume lifecycle, bind mounts, Compose down and Compose volume names/external volumes on 2026-09-20. This is a documentation-based state model, not a live Engine conformance test. It models neither host failure nor application/database consistency. Continue to the restore Lab to examine separate recovery checks.
컨테이너를 다시 생성해도 데이터가 자동으로 복원되지 않습니다. 스토리지 경계를 명확히 하고, 각 작업에서 정확히 어떤 항목이 삭제되는지 확인하십시오. 이 연습은 문서 기반이며, 2026년 9월 7일에 검토되었습니다. 실제 운영 환경의 컨테이너나 볼륨은 테스트에 사용되지 않았습니다.
세 가지 스토리지 위치
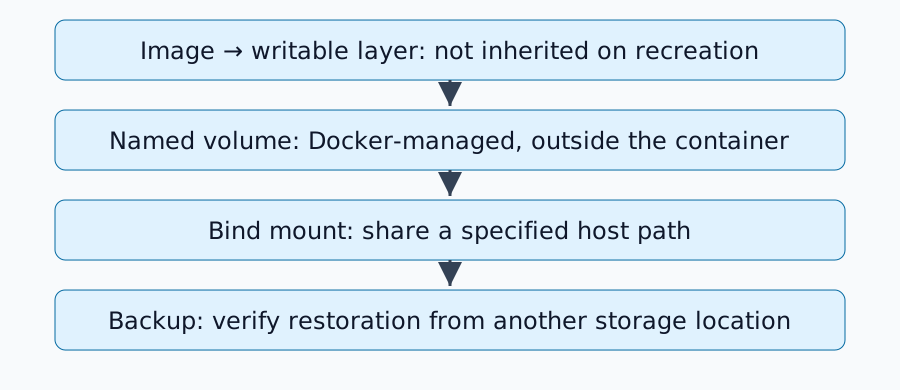
| 위치 | 소유권 경계 | 컨테이너 삭제 후 |
|---|---|---|
| 쓰기 가능 레이어 | 개별 컨테이너 | 해당 레이어의 변경 사항은 손실됩니다 |
| 명명된 볼륨 | 독립적인 Docker 관리 스토리지 | 볼륨이 삭제되지 않는 한 유지됩니다 |
| 바인드 마운트 | 지정된 Docker 호스트 경로 | 호스트 파일로 유지됩니다 |
중지/재시작은 삭제/재생성과 다릅니다. 볼륨 문서에서 볼륨의 수명 주기를 설명합니다. 익명 볼륨은 --rm을 포함하여 다른 정리 규칙을 따릅니다. 이 연습에서는 명명된 볼륨을 사용합니다.
일회용 명명 볼륨 생성 연습
이 예제는 Docker Engine, Linux 컨테이너 및 alpine:3.21을 가정합니다. Docker 버전과 실제로 다운로드한 이미지 다이제스트를 기록해 두십시오. 태그는 변경될 수 있습니다. 진행하기 전에 docker volume ls을 사용하여 duskcoil-lifetime-demo가 사용되지 않는지 확인하십시오.
docker volume create duskcoil-lifetime-demo
docker run --rm --mount type=volume,source=duskcoil-lifetime-demo,target=/data alpine:3.21 sh -c 'echo saved > /data/note.txt; echo temporary > /tmp/note.txt'
docker run --rm --mount type=volume,source=duskcoil-lifetime-demo,target=/data,readonly alpine:3.21 sh -c 'cat /data/note.txt; test ! -e /tmp/note.txt'
예상 결과: 두 번째 컨테이너는 /data/note.txt에서 저장된 데이터를 읽지만, /tmp/note.txt은 존재하지 않습니다. 첫 번째 컨테이너를 제거해도 명명 볼륨은 그대로 유지됩니다. 두 번째 마운트는 읽기 전용입니다. 이 연습에 실제 운영 환경의 서비스 이름이나 데이터를 사용하지 마십시오.
바인드 마운트는 어떤 호스트를 사용합니까?
바인드 마운트는 Docker 데몬 호스트의 경로를 참조합니다. 원격 데몬은 로컬 PC의 파일을 볼 수 없을 수도 있습니다. Docker Desktop은 VM 경계를 도입합니다.
docker inspect <container>에서 마운트 유형, 소스, 대상 및 읽기/쓰기 권한을 확인하십시오. 애플리케이션 설정을 변경하기 전에 잘못된 /data 마운트를 수정하십시오. 마운트된 디렉터리가 그 아래에 있는 기존 파일을 가릴 수 있으므로, 누락된 데이터와 다른 마운트된 디렉터리에 의해 숨겨진 데이터를 구분하십시오.
Compose 정리 의미 체계 읽기
docker compose down은 docker compose down --volumes과 다릅니다. 후자는 Compose에 선언된 명명된 볼륨을 대상으로 하며, 외부 볼륨은 별도로 관리됩니다. 아래 참조을 확인하십시오.
Compose 프로젝트 이름을 변경하면 새로 명명된 볼륨이 선택되어 애플리케이션이 비어 있는 것처럼 보일 수 있습니다. 손상 여부를 판단하기 전에 실제 이름을 확인하십시오. 더 이상 필요하지 않음을 확인한 후 특정 이름으로만 해당 볼륨을 제거하십시오. 이 절차에는 전체 볼륨 정리가 포함되지 않습니다.
영구 저장은 백업이 아닙니다
볼륨은 컨테이너 수명 주기와 데이터를 분리하지만, 디스크 오류나 애플리케이션 삭제로부터 데이터를 완벽하게 보호하는 것은 아닙니다. 별도의 복사본을 보관하고 복원 테스트를 수행하십시오. 실행 중인 데이터베이스 파일을 복사하면 일관성이 떨어질 수 있으므로, 애플리케이션에서 지원하는 백업 절차 또는 적절한 종료/스냅샷 조건을 사용하십시오.
이미지 및 Compose 파일만으로는 사용자 업로드 파일과 데이터베이스가 누락될 수 있습니다. 데이터베이스만으로는 필수 구성, 키 또는 호환 버전이 누락될 수 있습니다. 복원된 애플리케이션이 실제로 데이터를 읽을 수 있는지 확인하십시오.
스토리지 인벤토리 구축
각 서비스에 대해 컨테이너 내 경로, 실제 마운트 위치, 소유권/권한, 백업 방법, 복원 대상 및 마지막 복원 테스트 날짜를 기록하십시오. 그런 다음 홈 서버 복원 실습을 진행하여 필수 데이터가 포함되었는지 확인하십시오.
댓글
먼저 로그인해 주세요.
아직 데이터가 없습니다.